欢迎来到「Yogin」系列的完结篇!在这篇文章中,我们会完成框架的静态资源托管、HTML模板服务端渲染等基本功能,然后在gin的基础上,扩展简单的限流和Session管理中间件,作为功能完善和中间件编写练习。
静态资源托管
在一张网页中,除了文本以外,还会引入很多其它静态资源,例如JavaScript和CSS文件、图片文件等等,在HTML标签中通常以href属性引入。浏览器读到这些属性时会根据URL帮我们请求这些资源,这些资源和网页一样都托管在Web服务器上。
虽然在实践中,这些静态资源往往是和处理用户请求的服务器分开的,例如托管到专门的OSS/CDN服务器以减小服务器的压力,但作为Web服务器的基本功能,我们的框架应能向用户提供托管静态资源的简单接口。
托管单个文件
http标准库向我们提供了ServeFile1函数,可以向浏览器响应文件内容。需要注意的是,该函数不会将浏览器的请求URL与服务器上的文件路径关联,在收到请求时,它主要做两件事:
- 若发现URL中以
/index.html结尾,重定向到/; - 进行简单的安全检查,若发现URL中有
../这样的相对路径,拒绝服务请求。
随后,该函数直接向ResponseWriter写入文件内容。
因此,我们需要自己添加路由逻辑,将URL路径与服务器上的文件路径关联,即下面代码中group.GET和group.HEAD所做的事情。
1
2
3
4
5
6
7
8
9
10
11
12
// StaticFile registers a single route in order to serve a single file of the local filesystem.
// router.StaticFile("favicon.ico", "./resources/favicon.ico")
func (group *RouterGroup) StaticFile(relativePath, filepath string) {
    if strings.Contains(relativePath, ":") || strings.Contains(relativePath, "*") {
        panic("URL parameters can not be used when serving a static file")
    }
    handler := func(c *Context) {
        c.File(filepath)
    }
    group.GET(relativePath, handler)
    group.HEAD(relativePath, handler)
}
在与路由规则关联的handler中,我们调用了上下文Context的File方法,这是一个新增的方法,是对http.ServeFile的简单封装,负责往响应体里写入filepath指向的文件内容。
1
2
3
4
// File writes the specified file into the body stream in an efficient way.
func (c *Context) File(filepath string) {
    http.ServeFile(c.Writer, c.Request, filepath)
}
托管文件目录
大多数时候,我们的静态资源都统一放在服务器的某个目录下,这时候如果枚举目录下所有文件,对它们添加路由规则就显得太麻烦了。此时,我们希望借助*filepath通配符,用一条路由规则完成对文件目录的托管。
http.FileServer2可以实现我们的需求,在构造时向其传入http.FileSystem3,这是一个对系统上文件目录的抽象,可以用http.Dir快速新建一个FileSystem实例。
查看FileServer源码,与ServeFile函数不同的是,FileServer在处理请求时,会将URL中的路径与服务器上的文件路径关联。具体而言,响应请求时,服务器从FileSystem根路径出发,以请求URL为文件路径找到服务器上的文件,然后将其写入响应体。
1
2
3
4
5
6
7
8
9
10
11
12
func FileServer(root FileSystem) Handler {
    return &fileHandler{root}
}

func (f *fileHandler) ServeHTTP(w ResponseWriter, r *Request) {
    upath := r.URL.Path
    if !strings.HasPrefix(upath, "/") {
        upath = "/" + upath
        r.URL.Path = upath
    }
    serveFile(w, r, f.root, path.Clean(upath), true)
}
此外,若URL传入的路径以/结尾,私有方法serveFile会为其加上index.html。此外,请求URL中的路径有时与服务器上的路径不完全一致,例如,请求的路径为/assets/css/some.css,而服务器上将所有的CSS文件保存在./static/css下。此时,我们用http.StripPrefix4截断URL中的前缀,改变为/css/some.css,这样我们的FileServer从根路径./static出发,就可以找到与请求URL对应的./static/css/some.css文件了。
最后,在我们的FileServer真正开始服务请求前,服务器应该先对请求URL的合法性检查,判断其对应的文件名是否存在于服务器上,以及该文件是否有权被用户访问。若不满足条件,返回404状态码。至此,我们可以实现RouterGroup的Static方法:
1
2
3
4
5
6
7
8
9
10
11
12
13
14
15
16
17
18
19
20
21
22
23
24
25
26
27
28
29
30
31
32
33
34
35
// Static serves files from the given file system root.
// Internally a http.FileServer is used, therefore http.NotFound is used instead
// of the Router's NotFound handler.
// To use the operating system's file system implementation,
// use :
//     router.Static("/static", "/var/www")
func (group *RouterGroup) Static(relativePath, root string) {
    if strings.Contains(relativePath, ":") || strings.Contains(relativePath, "*") {
        panic("URL parameters can not be used when serving a static folder")
    }
    handler := group.createStaticHandler(relativePath, http.Dir(root))
    urlPattern := path.Join(relativePath, "/*filepath")

    // Register GET and HEAD handlers
    group.GET(urlPattern, handler)
    group.HEAD(urlPattern, handler)
}

func (group *RouterGroup) createStaticHandler(relativePath string, fs http.FileSystem) HandlerFunc {
    absolutePath := group.calculateAbsolutePath(relativePath)
    fileServer := http.StripPrefix(absolutePath, http.FileServer(fs))

    return func(c *Context) {
        file := c.Param("filepath")
        // Check if file exists and/or if we have permission to access it
        f, err := fs.Open(file)
        if err != nil {
            c.Status(http.StatusNotFound)
            return
        }
        f.Close()

        fileServer.ServeHTTP(c.Writer, c.Request)
    }
}
gin对http包的文件系统进一步封装5,用户可传入listDirectory参数,表示是否允许用户在浏览器中尝试遍历服务器的文件目录:
1
2
3
4
5
6
7
8
9
10
11
// Dir returns a http.FileSystem that can be used by http.FileServer(). It is used internally
// in router.Static().
// if listDirectory == true, then it works the same as http.Dir() otherwise it returns
// a filesystem that prevents http.FileServer() to list the directory files.
func Dir(root string, listDirectory bool) http.FileSystem {
    fs := http.Dir(root)
    if listDirectory {
        return fs
    }
    return &onlyFilesFS{fs}
}
服务端页面渲染
虽然目前实践中前后端已经分离开发,但对于小型项目依然可以让服务器渲染HTML模板,且服务端渲染对爬虫更加友好。作为Web框架,我们向用户提供简单的页面渲染接口。实际上,Go语言标准库已经向我们提供了强大的go template,支持HTML渲染,见html/template6。该模板支持对象和列表的渲染,以及函数调用,我们只需要对其简单封装。
在Engine结构体中,我们新增两个与HTML模板有关的字段:
1
2
3
4
5
type Engine struct {
    // ...
    htmlTemplates *template.Template // for html render
    FuncMap       template.FuncMap   // for html render
}
htmlTemplates保存服务器使用的模板文件,FuncMap保存模板中用到的go语言函数。它们的值使用如下函数初始化,注意FuncMap要先于htmlTemplates初始化**。
1
2
3
4
5
6
7
8
func (engine *Engine) LoadHTMLGlob(pattern string) {
    engine.htmlTemplates = template.Must(template.New("").Funcs(engine.FuncMap).ParseGlob(pattern))
}

// SetFuncMap sets the FuncMap used for template.FuncMap.
func (engine *Engine) SetFuncMap(funcMap template.FuncMap) {
    engine.FuncMap = funcMap
}
在使用时,指定模板名name和模板中涉及的go语言对象obj,调用模板的ExecuteTemplate7方法渲染页面。模板已经事先记录了需要的go语言函数,会自动执行这些函数。我们将模板渲染封装到上下文Context的HTML方法中:
1
2
3
4
5
6
7
8
9
10
11
12
13
14
15
16
17
18
19
func (c *Context) WithHTML(name string, obj interface{}) *Context {
    writeContentType(c.Writer, htmlContentType)
    var b strings.Builder
    if err := c.engine.htmlTemplates.ExecuteTemplate(&b, name, obj); err != nil {
        panic(err)
    }
    data := []byte(b.String())
    wc, _ := c.Writer.Write(data)
    c.bodySize += wc
    return c
}

// HTML renders the HTTP template specified by its file name.
// It also updates the HTTP code and sets the Content-Type as "text/html".
// See http://golang.org/doc/articles/wiki/
func (c *Context) HTML(code int, name string, obj interface{}) {
    c.Status(code)
    c.WithHTML(name, obj)
}
在gin的源码中,实现了更复杂的HTML渲染封装8,实际上,gin将响应体的渲染做了额外抽象,例如JSON这样的响应体都有专门的对象负责。感兴趣的读者可以看看gin中实现的renders9。
限流中间件
至此,我们已经实现了Web框架的主干代码,接下来我们扩展一些实用的功能:限流和Session管理。这两个中间件在gin中没有直接实现,但官方给出了第三方中间件仓库10,里面包含了丰富的gin中间件实现。
为了限制服务器同时服务的请求数量,我们可以编写一个简单的限流中间件。如下,利用Channel实现简单的资源管理。当Channel缓冲区满时,向其中发送消息的goroutine会被阻塞。这样,最多有n个请求被同时服务。
1
2
3
4
5
6
7
8
9
10
func MaxAllowed(n int) HandlerFunc {
    sem := make(chan struct{}, n)
    acquire := func() { sem <- struct{}{} }
    release := func() { <-sem }
    return func(c *Context) {
        acquire() // before request
        defer release() // after request
        c.Next()
    }
}
压力测试
我们可以用wrk11进行简单的压力测试,看看使用限流中间件前后的效果。在笔者的实验中,处理同一套服务逻辑(见post04_test.go),使用默认设置和开启限流中间件(最多同时服务4个请求),测试结果如下:
1
2
3
4
5
6
7
8
9
10
11
12
13
14
15
16
17
18
19
$ wrk -t16 -c500 -d30s http://localhost:8080/
Running 30s test @ http://localhost:8080/
  16 threads and 500 connections
  Thread Stats   Avg      Stdev     Max   +/- Stdev
    Latency    67.87ms   76.55ms   1.00s    89.29%
    Req/Sec   608.10    276.60     2.49k    67.75%
  284171 requests in 30.10s, 254.20MB read
Requests/sec:   9441.09
Transfer/sec:      8.45MB

$ wrk -t16 -c500 -d30s http://localhost:8080/
Running 30s test @ http://localhost:8080/
  16 threads and 500 connections
  Thread Stats   Avg      Stdev     Max   +/- Stdev
    Latency    48.89ms   44.29ms 501.75ms   65.41%
    Req/Sec   739.69    232.87     4.09k    75.37%
  350617 requests in 30.10s, 313.64MB read
Requests/sec:  11648.66
Transfer/sec:     10.42MB
可见限流起到了细微的效果。当然,这只是一个简单的限流器,在实际环境中,根据负载性质的不同,这个限流器不一定真的能“加速”。
Session管理
在实践中,Session管理是Web框架常见的需求。Session管理要做到根据用户的Cookie字段查找到保存在服务器上的Session会话,将没有上下文的HTTP请求变为有上下文(有状态)的,这些状态保存在Session中。Session的保存方式也是多样的,可以保存在服务器内存里,也可以选择更健壮的方式,如存放在Redis集群中。
要实现完整的Session管理功能并不简单,我们要完成Session的存储,以及对Session的增删改查,同时还要在响应里通知浏览器设置Cookie。因此,本文的中间件基于gorilla/sessions12包开发。
该中间件根据Cookie名称获取对应的Session,若请求中不包含Cookie则会新建一个,稍后由服务器告知浏览器存储Cookie。获取到的Session记录在上下文的Keys字段中。
1
2
3
4
5
6
7
8
9
10
11
12
13
14
15
16
17
18
19
20
21
22
23
24
25
26
27
28
29
30
import (
    "github.com/gorilla/sessions"
)

var (
    key = []byte("super-secret-key")
    store = sessions.NewCookieStore(key)
)

const DefaultSessionKey = "session"

func Session(name string) HandlerFunc {
    return func(c *Context) {
        session, _ := store.Get(c.Request, name)
        c.Set(DefaultSessionKey, session)
        c.Next()
    }
}

func Sessions(names []string) HandlerFunc {
    return func(c *Context) {
        sessions := make(map[string]*sessions.Session)
        for _, name := range names {
            session, _ := store.Get(c.Request, name)
            sessions[name] = session
        }
        c.Set(DefaultSessionKey, sessions)
        c.Next()
    }
}
示例
至此,我们已经完成了Yogin的全部代码编写,最后让我们看看怎么用吧!下面这段代码展示了如何托管静态资源以及渲染HTML模板:
1
2
3
4
5
6
7
8
9
10
11
12
13
14
15
16
17
18
19
20
21
22
23
24
25
26
27
28
29
30
31
32
type person struct {
    Name string
    Age  int8
}

var people = [2]person{
    {Name: "Jack", Age: 20},
    {Name: "Rose", Age: 17},
}

func FormatAsDate(t time.Time) string {
    return t.Format("2006-01-02")
}

r := Default()
r.SetFuncMap(template.FuncMap{
    "FormatAsDate": FormatAsDate,
})

r.LoadHTMLGlob("testdata/templates/*")
r.Static("/", "./testdata/assets")
r.StaticFile("/jack_and_rose.jpg", "./testdata/assets/img/jack_and_rose.jpg")

r.GET("/", func(c *Context) {
    c.HTML(http.StatusOK, "hello.tmpl", H{
        "name": "yogin",
        "now": time.Now(),
        "people": people,
    })
})

r.Run(":8080")
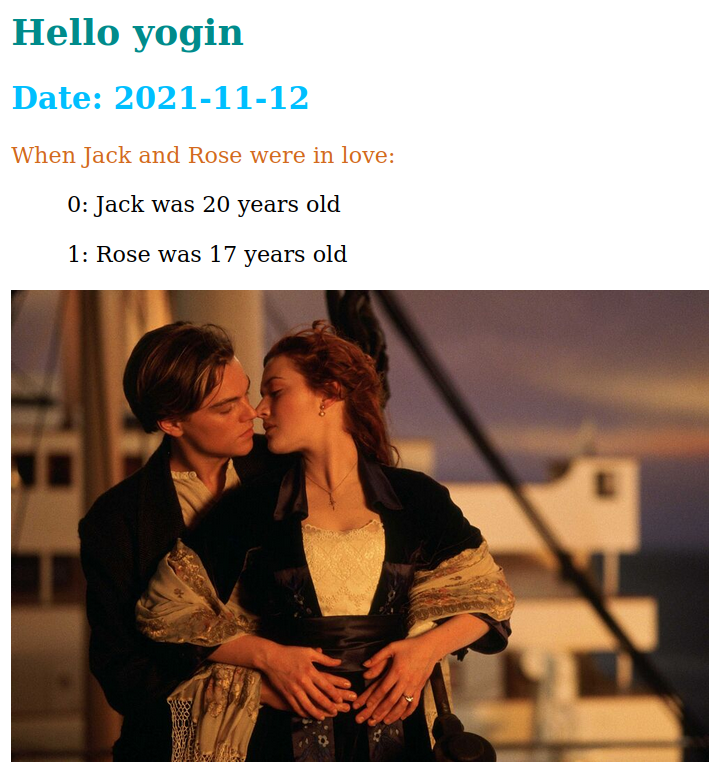
如果将这个测试用例跑起来,你可以在浏览器中访问本地的8080端口,得到这样一张网页:
下面的代码展示了如何使用Session中间件。在服务请求时,用MustGet方法获取上游中间件保存的Session,用session.Save方法向服务响应中写入设置Cookie相关的字段。这段代码只展示了服务器的逻辑,客户端发起请求、保存Cookie信息,以及在请求头中加入Cookie的流程可在post04_test.go中查看。
1
2
3
4
5
6
7
8
9
10
11
12
13
14
15
16
17
18
19
20
21
22
23
24
25
26
27
r := Default()
r.Use(Session("auth"))

r.GET("/login", func(c *Context) {
    session := c.MustGet(DefaultSessionKey).(*sessions.Session)
    session.Values["authenticated"] = true
    session.Save(c.Request, c.Writer)
    c.String(http.StatusOK, "login success")
})

r.GET("/logout", func(c *Context) {
    session := c.MustGet(DefaultSessionKey).(*sessions.Session)
    session.Values["authenticated"] = false
    session.Save(c.Request, c.Writer)
    c.String(http.StatusOK, "logout success")
})

r.GET("/secret", func(c *Context) {
    session := c.MustGet(DefaultSessionKey).(*sessions.Session)

    if auth, ok := session.Values["authenticated"].(bool); !ok || !auth {
        c.String(http.StatusForbidden, "login first")
        return
    }

    c.String(http.StatusOK, secret)
})
更多测试用例以及网页静态资源可参阅本文的代码仓库,我在其中给出了一个更复杂的场景,即Session除了用来管理鉴权以外,还记录了服务请求的上下文,可以展示用户登录后到现在一共调用了多少次API。另外,该场景中我们还模拟了10个用户同时访问服务器的情形,验证服务器的输出是否会出错。
完整代码仓库

「Yogin」系列全部代码可在我的GitHub代码仓库中查看:Yogin is Your Own Gin
欢迎提出各类宝贵的修改意见和issues,指出其中的错误和不足!
最后,感谢你读到这里,希望我们都有所收获!